


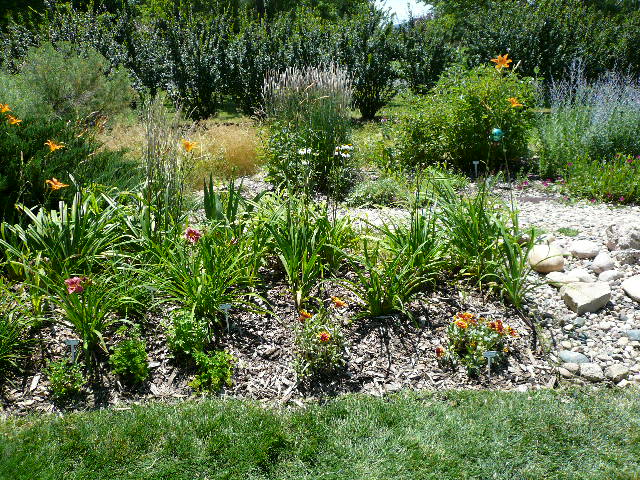
Why Choose a Rain Garden?
Rain gardens have become a cornerstone practice for eco-friendly landscapes. Their main benefit lies in their ability to intercept and filter stormwater runoff, curbing urban flooding and helping restore the natural water cycle. Many urban and suburban neighborhoods struggle with excessive runoff due to hard surfaces like roads and rooftops, which prevent water from soaking into the ground. By capturing this runoff, rain gardens help recharge groundwater, reduce the burden on sewer systems, and decrease the risk of contaminated water reaching nearby streams and rivers. According to the Environmental Protection Agency (EPA), these simple features can remove up to 90% of nutrients and chemicals and up to 80% of sediments from stormwater, making them a worthwhile investment for those wanting to make a difference at home.
Starting your project correctly involves understanding materials and their specific roles. Connecting with a reputable landscape supply store can save considerable time and confusion, offering expert advice on the selection process. The right supplier streamlines the gathering of high-quality soil, mulch, and stone, and often provides installation tips, helping you avoid common pitfalls such as poor drainage or unstable garden edges.
What Soil Mix Is Best?
A successful rain garden depends on the appropriate soil blend, consisting of 50-60% coarse sand, 20-30% finished compost, and topsoil. This combination offers a porous structure for rainwater to filter, while the compost provides essential nutrients for plant growth. Sand is the primary drainage agent, preventing standing water from suffocating plant roots and promoting mosquito breeding. To achieve the right blend, perform a percolation test at your selected location, measuring the water’s infiltration rate. If drainage is slow, increase the sand ratio; if water passes quickly, incorporate more compost or topsoil to retain moisture.
Role of Stones and Rocks in Rain Gardens
Stones and rocks are crucial in a rain garden’s design, contributing to aesthetic appeal, directing water flow, and preventing soil erosion. They function like a splash pad, stopping soil from washing away during heavy rainfall. Flat stones or cobblestones help maintain the garden’s edge, while large accent boulders anchor the design and support taller plant species. Additionally, stones create microhabitats that support local wildlife. Stepping stones facilitate maintenance and prevent soil compaction, enhancing drainage.
Rain Garden Plants and Ecology
Plant selection is key to a rain garden’s longevity and beauty. Native plants thrive under the conditions created by a rain garden’s hydrology—they have deep roots, tolerate periodic flooding and drought, and supply nectar, berries, and shelter for various insects and birds. Using a diversity of native wildflowers, sedges, ferns, and shrubs ensures resilience against diseases and pests and offers color and interest through every season. For example, species like blue flag iris and swamp milkweed soak up excess water, while purple coneflower and black-eyed Susan add vibrant splashes of summer color.
Arranging plantings by height and moisture preference—placing more water-loving varieties at the basin’s center and drought-tolerant plants along the drier edges—helps achieve a self-sustaining system.
Step-by-Step: Building Your Rain Garden
- Choose the Location: Find a low spot at least 10 feet away from building foundations, downspouts, or sump pump outlets, but within range of a natural water source like driveways or roofs.
- Test the Drainage: Perform a percolation test by filling a hole with water and timing drainage. Amending the soil is easier at the start than fixing problems after planting.
- Excavate and Shape: Dig a shallow depression (6–12 inches), sloping gently inward to form a basin. The garden should follow the contour of your yard for optimal runoff collection.
- Mix and Add Soil: Blend sand, compost, and topsoil on a tarp before transferring to the garden bed, ensuring even distribution of components.
- Integrate Stones and Create Edges: Line inflow and outflow zones with river rock or gravel, embed larger stones at strategic anchor points, and define the garden perimeter with flat stone or cobble edging.
- Layer Plants: Arrange the tallest and most moisture-loving plants near the center, transitioning to shorter, more drought-tolerant varieties near the edges. This creates natural variation and prevents overcrowding.
- Mulch and Water: Add a mulch layer (preferably shredded hardwood) for moisture retention and weed suppression, carefully avoiding rocks in water paths. Water thoroughly after initial installation to help plants take root.
If you want to know more about How to Prep Your Home for Heavy Rainfall or Storms, then visit our Home Improvement category.