

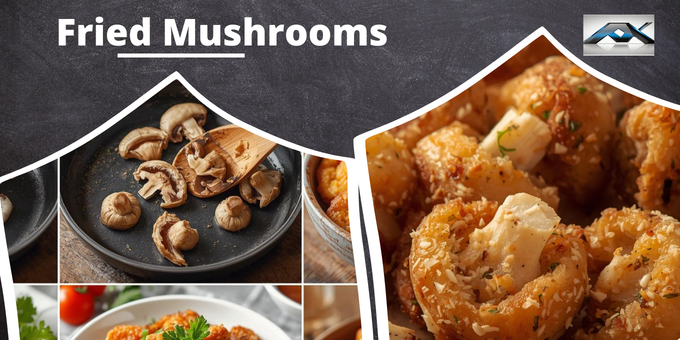
The reliable way to make crispy fried mushrooms is to keep the mushrooms bone dry, use a dredge of 80 percent flour to 20 percent cornstarch, and fry at 350°F (175°C) for 3 to 4 minutes. Wet mushrooms and cool oil are the two reasons home-fried mushrooms turn out soggy, and both are fixable in under a minute of prep.
This guide gives you the full recipe for a pound of golden, shatteringly crisp mushrooms in about 27 minutes, with exact quantities, oil temperatures and timings. It then goes further than most recipes: the restaurant double-fry, a gluten-free dredge that does not go gummy, the oil-to-food ratio that stops your pan from stalling, high-altitude corrections, a costed ingredient list at 2026 US grocery prices, air fryer and oven versions, five flavor variations, three from-scratch dipping sauces, safety basics and a troubleshooting table for when a batch goes wrong.
Crispy Fried Mushrooms at a Glance
| Detail | Specification |
|---|---|
| Prep time | 15 minutes |
| Cook time | 12 minutes (3 batches) |
| Total time | 27 minutes |
| Yield | 1 lb (450 g), serves 4 as an appetizer |
| Frying temperature | 350°F / 175°C |
| Fry time per batch | 3 to 4 minutes |
| Oil depth | 2 inches (5 cm) minimum |
| Oil to food ratio | 6:1 by weight per batch |
| Air fryer alternative | 400°F / 200°C for 10 to 12 minutes |
| Oven alternative | 425°F / 220°C for 18 to 20 minutes |
| Best mushrooms | Cremini or small button caps |
| Ingredient cost | About $7.60 a batch, roughly $1.90 a serving |
Equipment You Need
You do not need a deep fryer. A heavy pot and a few basic tools do the job better than most countertop units, because a thick-walled pot holds its temperature more steadily.
- Heavy Dutch oven or deep skillet, 5 to 7 quarts, so 2 inches of oil leaves at least 3 inches of headroom
- Clip-on or instant-read thermometer that reads up to at least 400°F
- Spider strainer or slotted spoon for lowering and lifting batches
- Wire rack set over a sheet pan for resting breaded mushrooms and draining fried ones
- Three shallow bowls for the breading station
- Fine mesh strainer for skimming loose crumbs between batches
- A lid or sheet pan that fits over the pot, kept within reach in case of a flare-up
Ingredients with Exact Quantities
For the mushrooms
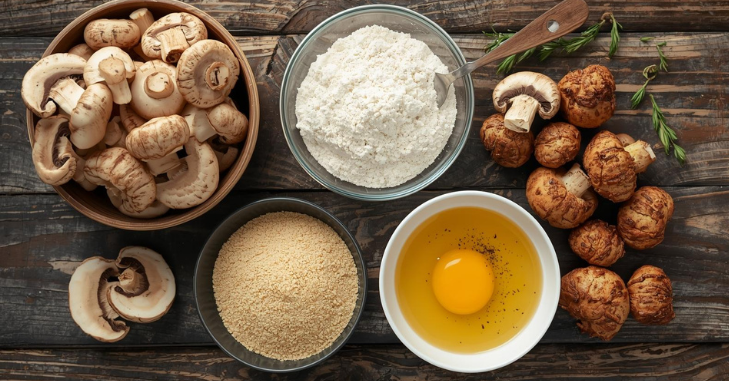
- 1 lb (450 g) cremini mushrooms, small caps left whole, larger ones halved through the stem
- 4 cups (about 1 liter) neutral frying oil — canola, peanut, sunflower or refined avocado
- 1 tsp flaky salt, for finishing while hot
For the dry dredge
- 1 cup (125 g) all-purpose flour
- 1/4 cup (30 g) cornstarch — this is the single most important ingredient for crunch
- 1 1/2 tsp kosher salt (about 5 g, or 3 percent of the dredge weight)
- 3/4 tsp freshly ground black pepper
- 1 tsp garlic powder
- 1 tsp smoked paprika
- 1/2 tsp onion powder
- 1/2 tsp baking powder (optional, for a slightly puffed crust)
For the wet coat
- 2 large eggs
- 1/4 cup (60 ml) buttermilk or whole milk
For the outer crumb
- 1 1/2 cups (90 g) panko breadcrumbs
- 1/4 cup (25 g) finely grated Parmesan (optional)
Step-by-Step Method
1. Clean the mushrooms without soaking them (3 minutes)
Wipe each mushroom with a barely damp paper towel or brush off the dirt with a soft brush. Do not run them under the tap and do not soak them. Mushrooms are roughly 90 percent water by weight already, and the cap surface absorbs more readily than most vegetables. Every gram of surface water you add has to boil off before the crust can brown, which is exactly how a coating goes pale and greasy.
2. Trim and cut to size (2 minutes)
Trim the dry end off each stem. Leave caps under 1 1/4 inches (3 cm) whole; halve anything larger so every piece cooks in the same 3 to 4 minutes. Uniform size matters more than shape. If you want to be exact about it, weigh a few pieces: anything between 12 and 18 grams will finish together. A 30 gram piece next to a 12 gram piece guarantees that one of them is wrong.
3. Set up a three-station breading line (3 minutes)
Bowl one: whisk the flour, cornstarch, salt, pepper, garlic powder, smoked paprika, onion powder and baking powder. Bowl two: beat the eggs with the buttermilk until fully combined. Bowl three: panko and Parmesan, tossed together. Keep one hand for dry and one for wet, or you will end up with breaded fingers instead of breaded mushrooms.
4. Bread the mushrooms (5 minutes)
Toss each mushroom in the seasoned flour first, tap off the excess, dip into the egg mixture, let it drip for two seconds, then press firmly into the panko. That first thin flour layer is what gives the egg something to grip. Set the breaded mushrooms on a wire rack in a single layer and let them sit 10 minutes before frying — this dries the coating slightly and makes it far less likely to slide off in the oil.
5. Heat the oil to 350°F (175°C)
Pour oil into a heavy Dutch oven or deep skillet to a depth of 2 inches, leaving at least 3 inches of clearance to the rim. Use a thermometer. If you do not have one, drop in a single panko crumb: at the right temperature it sizzles steadily and browns in about 45 seconds. Violent sputtering means the oil is too hot; a lazy fizzle means it is too cool. A clip-on probe or an instant-read that registers in two seconds is worth more here than any other piece of kit, and it sits near the top of our list of must-have gadgets for modern home cooks.
6. Fry in batches of about 10 (12 minutes total)
Lower the mushrooms in with a spider or slotted spoon, no more than one loose layer at a time. Overcrowding is the second most common failure: a cold pound of food dropped into hot oil can pull the temperature down 40 to 50 degrees in seconds, and everything then simmers in oil rather than frying. Fry 3 to 4 minutes, turning once at the halfway point, until deep golden. Let the oil climb back to 350°F between batches.
7. Drain on a rack and salt immediately (1 minute)
Lift onto a wire rack set over a sheet pan, not onto paper towels — paper traps steam underneath and softens the bottom of every piece. Season with flaky salt while the surface is still glossy, which is the only moment it will stick properly. Serve within 10 minutes for peak crunch.
How to tell when they are done
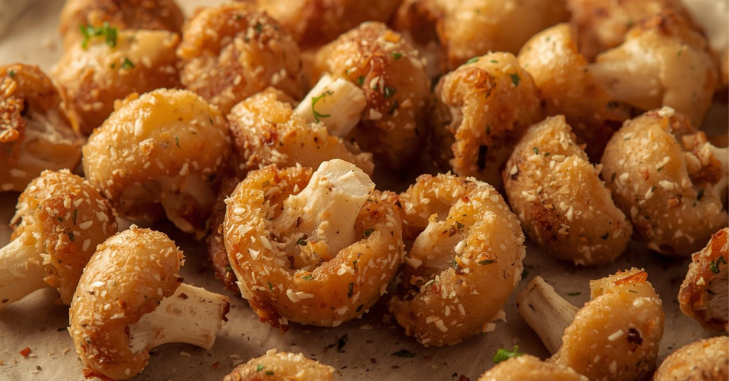
Color is the most reliable cue. Pull the mushrooms when the panko is an even, deep golden brown with no pale patches near the stem end. The bubbling around each piece also slows noticeably as surface moisture runs out, which is a useful second signal. If you are unsure, sacrifice one piece: cut it in half and check that the mushroom is soft and juicy all the way through and the crust snaps rather than bends. Once you have done this for one batch, the timing for the rest is predictable.
The Oil-to-Food Ratio Nobody Mentions
Most soggy batches are not a recipe problem, they are a thermal mass problem. Oil holds far less heat per unit volume than water, and a burner can only put energy back in at a fixed rate. The practical rule is six parts oil to one part food by weight, per batch. Four cups of oil weighs about 840 grams, so the largest batch that pan can handle without stalling is roughly 140 grams of breaded mushrooms — about ten pieces.
| Batch weight into 4 cups of oil | Typical temperature drop | Result |
|---|---|---|
| 140 g (about 10 pieces) | 15 to 20°F | Recovers in under a minute, crisp crust |
| 280 g (about 20 pieces) | 35 to 45°F | Pale, noticeably greasier |
| 450 g (the whole pound) | 60°F or more | Coating detaches, mushrooms stew |
Two other levers matter. Start the oil 10 to 15 degrees above your target so the drop lands you at 350°F rather than below it, and use a heavy pan — a 5 to 7 quart enameled cast iron Dutch oven holds and returns heat far better than a thin stockpot. An induction hob recovers fastest of all, because it can dump full power back into the pan the instant the temperature dips.
The Restaurant Double-Fry
The single biggest upgrade to this recipe is not an ingredient, it is a second trip through the oil. Fry once at a lower temperature to cook the mushroom and set the crust, rest, then fry again hot and fast to drive out the last of the surface moisture. The crust ends up thinner, harder and dramatically longer-lasting.
| Stage | Temperature | Time | What it does |
|---|---|---|---|
| First fry | 325°F / 163°C | 2 to 2 1/2 min | Cooks the mushroom through, sets the panko, pale gold |
| Rest on a rack | Room temperature | 5 to 20 min | Interior steam escapes instead of soaking the crust |
| Second fry | 375°F / 190°C | 60 to 90 sec | Final browning, glassy fracture, deep color |
Single-fried mushrooms soften in about 10 minutes on the counter. Double-fried ones stay genuinely crisp for 25 to 30 minutes, which is the difference between serving four people at a table and serving twelve at a party. The rest between fries can stretch to two hours at room temperature or overnight in the refrigerator, which makes this the method to use if you want to do the work before guests arrive. The same logic is why chips and a properly made onion rings recipe are fried twice in almost every restaurant kitchen.
The Science Behind a Crust That Stays Crisp
Four things are doing the work here, and understanding them lets you fix problems rather than guess.
Cornstarch limits gluten. Flour alone forms gluten when it hydrates, which produces a coating that is tough and chewy rather than brittle. Swapping roughly 20 percent of the flour for cornstarch dilutes the protein, so the crust fractures instead of bending. Push past about 40 percent cornstarch and the coating turns chalky and struggles to brown, because there is too little protein left for the Maillard reaction to work with.
Frying is a dehydration process. Oil at 350°F drives water out of the coating as steam. That outward rush of steam is also what keeps oil from soaking inward. Once the coating is dry and porous, it is crisp. If the oil is too cool, steam pressure is too low, oil migrates in, and you get grease instead of crunch.
The Maillard reaction needs heat and dryness. Browning flavor develops meaningfully above roughly 285°F (140°C) at the food surface, and that surface cannot exceed 212°F while it is still wet. Dry surface first, brown second.
Mushrooms release their own water. Unlike chicken or vegetables with a firm cell wall, mushrooms collapse and weep as they heat. A sturdy panko shell contains that moisture and keeps it from reaching the crust from the inside.
One more point worth knowing: most of the oil a fried food carries is not absorbed during frying at all. Published work on battered and breaded foods finds the bulk of the fat is drawn into the crust during cooling, as the escaping steam condenses and the resulting vacuum pulls surface oil inward. That is the real reason a wire rack beats a plate. Oil that drains away in the first 30 seconds never gets the chance to be sucked back in.
Pre-Drying: Two Tricks That Buy You a Better Crust
If your mushrooms came out of a sealed clamshell and feel even slightly tacky, spend three extra minutes removing water before you bread them.
The salt-and-blot. Toss the trimmed mushrooms with 1/2 teaspoon of fine salt, leave them on a rack for 10 minutes, then blot. Osmosis pulls a surprising amount of surface moisture out, typically 10 to 15 grams from a pound, and the seasoning goes right into the mushroom rather than sitting on the outside of the crust. Reduce the salt in the dredge by a quarter teaspoon if you do this.
The microwave pre-cook. Spread the mushrooms in a single layer on a plate and microwave, uncovered, for 3 to 4 minutes on full power. They will shed a startling pool of liquid and lose roughly 25 percent of their weight. Drain, cool to room temperature, and bread as normal. The mushrooms come out denser and more intensely flavored, the crust has far less internal steam fighting it, and fry time drops to about 2 1/2 minutes. The trade-off is a chewier, meatier bite rather than a soft interior, so try it on half a batch before committing.
Choosing the Outer Crumb
Panko is the default here for a reason, but it is not the only option, and each coating gives a noticeably different result. The table below compares the crumbs most home cooks already have in the pantry.
| Coating | Texture | Browning speed | Best use |
|---|---|---|---|
| Panko | Light, jagged, airy shatter | Moderate | The all-round choice for deep frying and air frying |
| Fine dried breadcrumbs | Dense, even, sandy crunch | Fast | Small button caps where you want a thin shell |
| Crushed saltine or butter crackers | Rich, short, slightly salty | Fast | Diner-style mushrooms; cut the dredge salt by half |
| Crushed cornflakes | Coarse, glassy crunch | Fast | Gluten-free versions and oven baking |
| Flour and starch only, no crumb | Thin, crackly, tempura-like | Slow | Oyster and maitake clusters, where the frills do the work |
Whatever you choose, press the crumb on firmly with your palm rather than just rolling the mushroom through it. Loose crumbs fall off in the oil, burn and leave the dark specks covered in the troubleshooting table further down. If your crumb is very coarse, pulse it two or three times in a food processor so it has a mix of fine and larger pieces; the fine ones fill the gaps and the larger ones give the crunch.
Seasoning Swaps for the Dredge
The base dredge leans on garlic, onion and smoked paprika, which suits almost everything. Once you have made it a few times, the seasoning is the easiest thing to change without affecting the crust. Keep the salt and the 80/20 flour-to-starch ratio fixed, and swap only the aromatics, using about 2 1/2 teaspoons of spice in total for every cup of flour.
- Cajun: 1 tsp paprika, 1/2 tsp cayenne, 1/2 tsp dried thyme, 1/2 tsp garlic powder. Pair with the smoky ranch.
- Italian herb: 1 tsp dried oregano, 1 tsp garlic powder, 1/2 tsp dried basil, plus the optional Parmesan in the panko. Serve with warm marinara.
- Lemon pepper: 1 1/2 tsp lemon pepper seasoning and 1 tsp garlic powder, then a squeeze of fresh lemon at the table. Check the salt content of the blend and reduce the dredge salt to match.
- Everything bagel: mix 2 tbsp everything bagel seasoning into the panko rather than the flour so the seeds stay visible on the crust.
- Ranch-style: 1 tsp dried dill, 1 tsp onion powder, 1/2 tsp garlic powder, 1/2 tsp dried parsley.
Dried herbs scorch more easily than ground spices, so keep anything leafy to a teaspoon or less and do not push the oil above 350°F with these blends.
Gluten-Free Without the Gumminess
A cup-for-cup gluten-free baking blend is the wrong tool here. Those blends are engineered for cakes and lean heavily on rice flour plus xanthan gum, and the gum is what turns a fried coating sticky and slightly slick. Build the dredge from single ingredients instead.
| Component | Standard version | Gluten-free version |
|---|---|---|
| Dredge base | 1 cup all-purpose flour | 3/4 cup white rice flour + 1/4 cup sweet rice flour |
| Crisping starch | 1/4 cup cornstarch | 1/4 cup cornstarch or tapioca starch |
| Outer crumb | 1 1/2 cups panko | 1 1/2 cups gluten-free panko, or crushed cornflakes |
| Frying temperature | 350°F | 355 to 360°F — rice flour browns more slowly |
| Texture | Light shatter | Harder, glassier, slightly more brittle |
Crushed cornflakes are the sleeper option. They are naturally gluten-free in most brands, brown quickly, and give a coarser crunch than panko. Crush them to roughly the size of coarse sea salt; any finer and they behave like breadcrumbs.
Which Mushrooms Fry Best
| Variety | Prep | Fry time at 350°F | Notes |
|---|---|---|---|
| Cremini | Whole or halved | 3 to 4 min | Best all-round choice: firm, low moisture, deep flavor |
| White button | Whole | 3 min | Mildest, cheapest, most widely available |
| Shiitake | Caps only, stems discarded | 3 to 4 min | Meatiest texture and strongest umami |
| Oyster | Torn into clusters | 2 to 3 min | Delicate, frilly edges crisp beautifully but burn fast |
| King oyster | Sliced 1/2 inch thick | 4 min | Dense and scallop-like; best cut into coins |
| Maitake | Pulled into fronds | 2 to 3 min | Highest surface area, most dramatic crunch |
| Lion’s mane | Torn into 1 inch tufts | 3 min | Now widely stocked; crab-like strands, needs a firm press into the panko |
| Portobello | Cut into 1/2 inch strips, gills scraped | 4 to 5 min | Very wet; scrape gills or the coating will steam |
Whatever you buy, look for caps that are firm and dry with no dark slimy patches, and use them within three or four days. Store them in a paper bag in the refrigerator rather than the plastic clamshell, which traps condensation.
A shopping checklist for frying mushrooms
A few seconds of checking at the store saves a soggy batch later. Before you buy, run through these points:
- Closed or barely open caps. On cremini and button mushrooms, a tight veil under the cap means a firmer, drier mushroom. Wide-open caps with dark exposed gills hold more moisture and shed it into the coating.
- Dry, matte surface. A slight bloom is fine; a shiny or sticky surface means the mushrooms have been sweating in their packaging.
- Even sizing. Loose mushrooms let you pick caps of similar size, which makes the timing in this recipe much easier to hit. Pre-packed trays often mix very small and very large caps.
- Firm stems. Gently squeeze one. It should feel springy, not spongy or hollow.
- A clean smell. Fresh mushrooms smell earthy and mild. Any sour or fishy note means they are past their best.
Loose mushrooms sold by weight are often a little cheaper per pound than sealed trays, and buying exactly one pound avoids leftovers that go slimy in the refrigerator.
What a Batch Actually Costs in 2026
Mushrooms remain one of the cheapest ways to put something impressive on a table. USDA figures for the 2025-26 season put US Agaricus sales at 620 million pounds at an average grower price of about $1.37 a pound, with volume down 5 percent on the previous season — supply has tightened a little, which is why shelf prices have edged up rather than fallen.
| Item | Amount used | Typical 2026 US cost |
|---|---|---|
| Cremini mushrooms | 1 lb | $3.50 to $4.50 |
| Flour and cornstarch | 155 g | $0.35 |
| Eggs and buttermilk | 2 eggs, 60 ml | $0.90 |
| Panko | 90 g | $0.80 |
| Parmesan (optional) | 25 g | $1.10 |
| Frying oil consumed | About 60 ml absorbed | $0.35 |
| Total | Serves 4 | About $7.60, or $1.90 a head |
A comparable fried mushroom appetizer runs $9 to $13 at most US casual chains, so the home version lands at roughly a fifth of the cost per serving even before you count the sauce. The oil line assumes you strain and reuse the oil, which is the honest way to count it — charging a whole liter of oil to one batch is the sort of math that makes home cooking look expensive. If keeping costs down is the point, this sits comfortably alongside our budget-friendly dinner ideas built on pantry staples.
Choosing Your Oil
| Oil | Approximate smoke point | Suitability |
|---|---|---|
| Refined avocado | 480 to 520°F | Excellent, expensive |
| Peanut | 450°F | Excellent, classic frying oil |
| Sunflower (refined) | 440°F | Excellent, neutral |
| Canola | 400°F | Good, inexpensive |
| Extra virgin olive | 375°F | Workable but marginal and costly |
| Butter | 300°F | Not suitable for deep frying |
You want at least 50 degrees of headroom between your target 350°F and the oil’s smoke point. Strain used oil through a coffee filter once it cools, store it in a sealed jar away from light, and reuse it two or three times for vegetables before discarding.
When to throw the oil away
Commercial kitchens measure total polar compounds with a meter and bin the oil at 24 to 25 percent, a threshold written into food safety rules across much of Europe. At home you are judging the same degradation by eye and nose, and the signals are reliable:
- It foams around the food in a persistent, soapy way rather than bubbling briskly
- It has darkened to the color of strong tea and looks thicker when you swirl it
- It smells sharp or fishy when cold, which is oxidation rather than seasoning
- It smokes below 350°F, meaning free fatty acids have built up and the smoke point has fallen
Two or three vegetable fries is realistic for canola; peanut and refined avocado will take four or five. Never pour it down the sink. Let it cool, funnel it back into its original bottle, and put it in the trash, or check whether your municipality runs a cooking-oil collection point — many now do, since used fryer oil is a feedstock for renewable diesel.
Deep-Frying Safety at Home
Hot oil deserves respect, and a few habits remove nearly all of the risk.
- Never leave the pot unattended. Oil can climb past its smoke point quickly on a high burner.
- Keep water away. Even a few drops hitting 350°F oil will spatter violently, which is another reason to dry the mushrooms well.
- Lower food in, do not drop it. Use a spider and release it close to the surface, moving away from you.
- Know what to do with a grease fire. Turn off the heat and smother the flames with a lid or sheet pan. Never use water, and never try to carry a burning pot outside. A kitchen-rated fire extinguisher is a sensible thing to own.
- Let oil cool completely before you strain or move it. That can take an hour or more in a heavy pot.
Frying at Altitude
Water boils at a lower temperature as you climb, so the interior of the food cooks more slowly relative to the crust and moisture leaves faster. Drop the oil temperature slightly and add time rather than fighting it.
| Elevation | Water boils at | Suggested oil temperature | Fry time per batch |
|---|---|---|---|
| Sea level | 212°F | 350°F | 3 to 4 min |
| 3,000 ft (Nashville to Boise) | 206°F | 345°F | 3 1/2 to 4 1/2 min |
| 5,280 ft (Denver) | 202°F | 340°F | 4 to 5 min |
| 7,000 ft (Santa Fe, Flagstaff) | 198°F | 335°F | 4 1/2 to 5 1/2 min |
At elevation, oil also degrades faster because the food gives up moisture more aggressively, so expect one fewer reuse from the same bottle.
Using a Countertop Deep Fryer
An electric deep fryer works well for this recipe, with two adjustments. First, most home units hold less oil than a Dutch oven filled to 2 inches, so apply the six-to-one ratio to the actual oil capacity printed on the fryer, not to the four cups in this recipe. A small 1 1/2 liter unit will handle only about eight pieces at a time without a large temperature drop. Second, the dial on many budget fryers is not accurate. Check it once with a separate thermometer and note how far off it runs, then adjust the setting rather than trusting the label.
The advantages are real: the thermostat brings the oil back to temperature on its own, the lid contains spatter, and the oil can stay in the unit between uses if you keep it covered. If you fry often, that convenience is worth having. If you fry a few times a year, the heavy pot and thermometer will serve you just as well and take up no counter space.
Whichever fryer you use, empty and clean it regularly. Crumbs left sitting at the bottom of the oil keep cooking every time you heat it, and they are one of the main reasons oil darkens and turns bitter faster than it should. Straining after every session and wiping out the basket and reservoir keeps the oil usable for its full number of reuses.
Air Fryer and Oven Versions
Air fryer
Bread as directed, then spray the coated mushrooms generously on all sides with oil — dry panko will not brown without fat. Air fry at 400°F (200°C) for 10 to 12 minutes in a single layer, shaking or flipping at the 6-minute mark. Expect a firm, dry crunch rather than the light shattering texture of deep frying, with roughly 70 to 80 percent less oil.
Two details make the difference between a good air-fried batch and a disappointing one. First, toast the panko before you use it: 3 minutes in a dry skillet with a teaspoon of oil gets it to the color it would otherwise never reach in a convection basket. Second, respect the basket capacity. A 4 quart drawer holds about 8 pieces in a true single layer, a 6 quart holds 12, and a dual-basket model lets you run two batches at once. Stacking is the air fryer equivalent of overcrowding the pan.
Oven
Preheat a sheet pan in a 425°F (220°C) oven for 10 minutes. Brush or spray the breaded mushrooms with oil, arrange them on the hot pan without touching, and bake 18 to 20 minutes, turning once at 12 minutes. Preheating the pan is what browns the underside. If your oven has a convection setting, use it and drop to 400°F: moving air strips the boundary layer of humid air off the coating and shortens the bake by around 3 minutes.
Five Variations Worth Making
Garlic Parmesan
Add 1/3 cup grated Parmesan to the panko and toss the finished mushrooms with 2 tbsp melted butter mixed with 3 minced garlic cloves and 2 tbsp chopped parsley.
Nashville-style hot
Whisk 3 tbsp of the hot frying oil with 1 tbsp cayenne, 1 tsp brown sugar, 1/2 tsp garlic powder and 1/2 tsp smoked paprika, then brush over the mushrooms straight from the fryer.
Vegan and dairy-free
Replace the egg wash with 1/2 cup aquafaba (the liquid from a can of chickpeas) whisked with 1 tbsp cornstarch, or a flax egg made from 2 tbsp ground flaxseed and 5 tbsp water rested 10 minutes. Use unsweetened plant milk in place of buttermilk and omit the Parmesan.
Beer-battered
Skip the panko entirely. Whisk 1 cup flour, 1/4 cup cornstarch, 1 tsp salt and 1 tsp baking powder with 1 cup cold lager until just combined, dip the floured mushrooms, and fry at 365°F for 3 minutes. The carbonation and cold liquid produce a lacier, lighter shell. Replacing 2 tablespoons of the lager with vodka takes it further still: ethanol evaporates at 173°F, so the batter dries and sets faster and develops less gluten on the way there.
Stuffed and fried
Use large button caps, stems removed. Fill each with about 2 tsp of softened cream cheese blended with chives and lemon zest, chill 20 minutes so the filling firms up, then bread and fry at 350°F for 4 minutes.
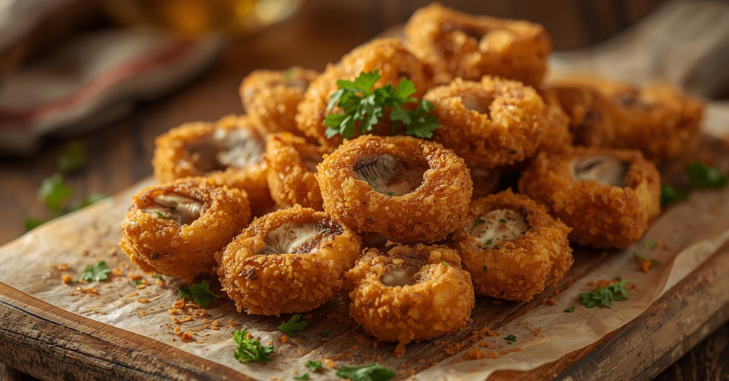
Three Dipping Sauces, Made Properly
- Garlic aioli: 1/2 cup mayonnaise, 2 grated garlic cloves, 1 tbsp lemon juice, 1/2 tsp Dijon, pinch of salt. Rest 15 minutes so the garlic mellows.
- Smoky ranch: 1/2 cup sour cream, 1/4 cup buttermilk, 1 tbsp each chopped dill and chives, 1/2 tsp smoked paprika, 1/4 tsp onion powder, salt to taste.
- Sriracha honey: 3 tbsp mayonnaise, 1 tbsp sriracha, 2 tsp honey, 1 tsp rice vinegar. Sharp enough to cut through the fried coating.
All three keep for five days in the refrigerator and all three are better made an hour ahead. Each adds roughly 90 to 110 calories per two-tablespoon portion, which is worth knowing if you are otherwise counting the oil carefully: the dip can quietly cost more than the frying does.
Troubleshooting Table
| Problem | Cause | Fix |
|---|---|---|
| Soggy, pale coating | Oil below 340°F or pan overcrowded | Fry in smaller batches, wait for the oil to recover between them |
| Coating slides off | Wet mushroom surface, or skipped the flour layer | Dry thoroughly, always flour before egg, rest 10 min before frying |
| Burnt outside, raw inside | Oil above 375°F | Drop to 350°F and extend the time |
| Greasy mouthfeel | Draining on paper towels or low oil temperature | Use a wire rack and verify temperature with a thermometer |
| Crust softens within minutes | Stacked or covered while hot | Keep in a single layer; hold in a 200°F oven if serving in batches |
| Bland despite seasoning | Salted after the surface cooled | Salt within 30 seconds of leaving the oil |
| Crust is chewy, not brittle | Too much gluten development in the dredge | Keep cornstarch at 20 percent; whisk the dry mix, do not knead the coating |
| Dark specks through the batch | Loose crumbs burning in the oil | Skim between batches with a fine mesh strainer |
| Second batch browns too fast | Oil crept above target while idle | Cut the heat between batches and re-check before each drop |
Common Mistakes to Avoid
Most failed batches come down to the same handful of shortcuts. Avoid these and the troubleshooting table below becomes almost unnecessary.
- Rinsing the mushrooms in a colander. It feels thorough, but it adds exactly the surface water that ruins the crust. Wipe or brush instead.
- Guessing the oil temperature. Stovetop dial settings vary wildly between burners and pans. A thermometer removes the guesswork for a few dollars.
- Breading everything and frying immediately. The 10-minute rest on a rack is what glues the coating on. Skipping it is the main reason crusts slide off.
- Using too much egg. A thick, dripping egg layer turns into a soft, omelet-like band between the mushroom and the crumb. Let each piece drip for two seconds.
- Frying the whole pound at once. See the oil-to-food ratio above: big batches crash the temperature and the coating soaks up oil.
- Piling finished mushrooms in a bowl. Steam from the pieces underneath softens everything. Keep them in a single layer until they go to the table.
- Salting late. Salt only sticks while the surface is still glossy with oil, so season within 30 seconds.
Scaling Up for a Crowd
Frying for more than four people is an exercise in scheduling, not cooking. Use the double-fry, do the first stage ahead, then finish everything in the last ten minutes.
| Guests | Mushrooms | Dredge | Panko | Batches | Active time |
|---|---|---|---|---|---|
| 4 | 1 lb | 1 cup + 1/4 cup starch | 1 1/2 cups | 3 | 27 min |
| 8 | 2 lb | 2 cups + 1/2 cup starch | 3 cups | 6 | 45 min |
| 12 | 3 lb | 3 cups + 3/4 cup starch | 4 1/2 cups | 9 | 65 min |
A party timeline that works
- Up to a day ahead: make the dipping sauces and refrigerate them.
- Two to three hours ahead: clean, trim and bread the mushrooms, then rest them on racks.
- One to two hours ahead: do the first fry at 325°F for every batch and leave the pieces on racks at room temperature.
- When guests arrive: reheat the oil to 375°F and finish each batch for 60 to 90 seconds.
- Serve in waves: send out each batch as it comes off the rack rather than waiting to serve everything at once.
Hold finished mushrooms in a single layer on a rack in a 200°F (95°C) oven for up to 30 minutes. Past that they dry out and the mushroom inside turns leathery. Do not cover them, and do not pile them into a bowl until the moment they go out.
Make-Ahead, Storage and Reheating
Breaded raw mushrooms hold in the refrigerator for up to 4 hours on a rack, uncovered. To freeze, arrange the breaded raw mushrooms on a tray, freeze solid for 2 hours, then bag for up to 3 months and fry straight from frozen, adding 1 to 2 minutes.
Cooked mushrooms keep 3 days in an airtight container in the refrigerator. Reheat in a 375°F (190°C) oven or air fryer for 4 to 5 minutes. Never use the microwave — it turns the crust to paste in under 30 seconds.
Homemade frozen breaded mushrooms beat the supermarket bags on two measures that matter. Commercial versions are typically par-fried and carry 8 to 11 grams of fat per 3 ounce serving before you cook them again, and the coating is engineered with modified starches to survive freezer burn, which is why it tastes faintly of the freezer. Your own frozen batch costs about half as much per serving and lets you control the salt entirely.
Nutrition, Realistically
| Per serving (1/4 recipe, approximate) | Deep fried | Double fried | Air fried |
|---|---|---|---|
| Calories | 290 kcal | 270 kcal | 195 kcal |
| Fat | 18 g | 16 g | 7 g |
| Carbohydrates | 24 g | 24 g | 24 g |
| Protein | 8 g | 8 g | 8 g |
| Sodium | 620 mg | 620 mg | 620 mg |
Double frying comes out marginally leaner than a single fry, which surprises people. The drier crust that results from the second, hotter pass holds less oil at the moment of cooling, when most fat uptake actually happens.
These are estimates, not laboratory values, and actual oil absorption varies with temperature control and batch size. The mushrooms themselves are genuinely low in calories and contain B vitamins, potassium, selenium and the antioxidant ergothioneine, a compound that has drawn steady research attention through 2025 and 2026 for its possible role in slowing age-related cognitive decline, though the human trial evidence is still early and no health claim is settled. Mushrooms exposed to ultraviolet light are also one of the few non-animal food sources of vitamin D: USDA measurements put UV-treated portabella at about 446 IU per 100 grams against roughly 1 to 9 IU for untreated white button. Look for packs labelled “vitamin D” or “UV-exposed” if that matters to you. The coating and the oil, not the mushroom, account for essentially all of the added calories.
Why Restaurant Versions Taste Different
If you have ordered fried mushrooms at a bar and wondered why they taste a little different from homemade, there are a few practical reasons. Commercial kitchens fry in large-capacity fryers that barely lose temperature when a basket goes in, so they can cook bigger batches than you can at home. Many also buy pre-breaded frozen mushrooms, which are par-fried at the factory and finished in the restaurant fryer; that is why the coating often looks very uniform and tastes faintly of the freezer. Finally, fryer oil in a busy kitchen has usually been used before, and lightly used oil browns food faster and adds a savory note that fresh oil lacks.
You can borrow the best of this at home. Reusing strained oil once or twice, as described above, gives a slightly deeper color. The double-fry mimics the restaurant habit of par-frying and finishing to order. And your own fresh breading, rested on a rack, will always beat a frozen commercial coating on texture.
What to Serve Them With
- As an appetizer with the aioli, alongside a crisp lager or a dry white such as Sauvignon Blanc
- Piled onto a burger in place of bacon for a meatless crunch
- Scattered over a creamy risotto or a bowl of buttered pasta just before serving
- On a bitter-leaf salad with lemon dressing, where the acidity cuts the fat
- As part of a larger spread with leftover ham recipes for a holiday buffet table
If you are cooking for a mixed-age crowd, the mild button-mushroom version is usually the one children reach for first; for the youngest eaters, our guide to homemade baby food covers appropriate textures. For a dessert to follow, the herbal jelly bowl that keeps your treats fresh works well after something fried.
Frequently Asked Questions
What temperature should I fry mushrooms at?
Fry at 350°F (175°C) for 3 to 4 minutes per batch. Below about 340°F the coating absorbs oil instead of crisping; above 375°F the crust browns before the mushroom inside has softened. A clip-on thermometer is the single most useful tool for this recipe.
Why does my coating fall off the mushrooms?
Almost always one of three things: the mushroom surface was damp, you skipped the dry flour layer before the egg wash, or you fried immediately after breading. Dry the mushrooms, always flour first so the egg has something to grip, and let the breaded mushrooms rest on a rack for 10 minutes before they go into the oil.
Does double frying mushrooms actually make them crispier?
Yes, and the difference is large. Fry at 325°F for 2 to 2 1/2 minutes, rest on a rack for at least 5 minutes, then fry again at 375°F for 60 to 90 seconds. Single-fried mushrooms soften in about 10 minutes; double-fried ones stay crisp for 25 to 30. The first fry can be done up to a day ahead and refrigerated, which is what makes this the method for parties.
Can I make crispy fried mushrooms in an air fryer?
Yes. Bread them exactly as for deep frying, spray them generously with oil on all sides, and air fry at 400°F (200°C) for 10 to 12 minutes in a single layer, flipping at 6 minutes. Toasting the panko in a dry skillet first gets you much closer to deep-fried color. The texture is drier and firmer than deep fried, and the oil used drops by roughly 70 to 80 percent.
How do I make them gluten-free?
Skip cup-for-cup baking blends, which contain xanthan gum and turn a fried coating sticky. Use 3/4 cup white rice flour plus 1/4 cup sweet rice flour with 1/4 cup cornstarch for the dredge, and gluten-free panko or coarsely crushed cornflakes for the crumb. Raise the oil to 355 to 360°F, because rice flour browns more slowly than wheat.
How long do fried mushrooms stay crispy, and can I reheat them?
They are at their best within 10 minutes of leaving the oil, or 25 to 30 minutes if you double fried them. Cooked mushrooms keep for 3 days in an airtight container in the refrigerator and reheat well in a 375°F (190°C) oven or air fryer for 4 to 5 minutes. Avoid the microwave, which softens the crust almost immediately.
Bottom Line on Crispy Fried Mushrooms
Crispy fried mushrooms come down to three numbers and one habit: dry mushrooms, an 80/20 flour-to-cornstarch dredge, 350°F oil and batches of about ten pieces. Rest the breaded mushrooms before frying and drain them on a rack, not paper. Once that base method is reliable, add the double-fry when you are cooking for a crowd, and you will get a crust that stays crisp long after it leaves the pot.